Published on forgoodnesssakecookbook.com (https://forgoodnesssakecookbook.com)

Home > Perfect Pumpkin Pie and Coconut Whipped Cream

Perfect Pumpkin Pie and Coconut Whipped Cream

Recipe courtesy of : 
Chef Sara Boan, Catskill Animal Sanctuary's Compassionate Cuisine program
Included In Cookbook: 

Ingredients

2 tablespoons
Powdered Sugar
1 teaspoon
Vanilla Extract

For Coconut Whipped Cream

1 can
Coconut Milk or Cream ( full-fat if using milk, yield will be slightly lower)

For Pie

1
Vegan Pie Crust (recipe follows, fitted into a 9-inch pie plate)
1 3⁄4 cup
Pumpkin Purée (or one 14-ounce can pure pumpkin, not pumpkin pie filling)
1⁄4 cup
Maple Syrup
1⁄2 cup
Brown Sugar
3⁄4 cups
Coconut Milk (full fat)
1⁄4 cup
Cornstarch
1⁄2 teaspoon
Salt
1 teaspoon
Ground Ginger
1 teaspoon
Ground Cinnamon
1⁄2 teaspoon
Ground Nutmeg
1 pinch
Ground Cloves
 
Non-dairy Milk (for brushing crust)
 
Turbinado Sugar (for sprinkling on crust)

For the Crust

1 1⁄2 cup
Flour (all-purpose, plus more for flouring work surface)
1 tablespoon
Sugar
1⁄4 teaspoon
Salt
1⁄2 cup
Vegan Butter (such as Earth Balance Buttery Sticks, chilled)
1 teaspoon
Apple Cider Vinegar
2 1⁄4
Ice Water

Description

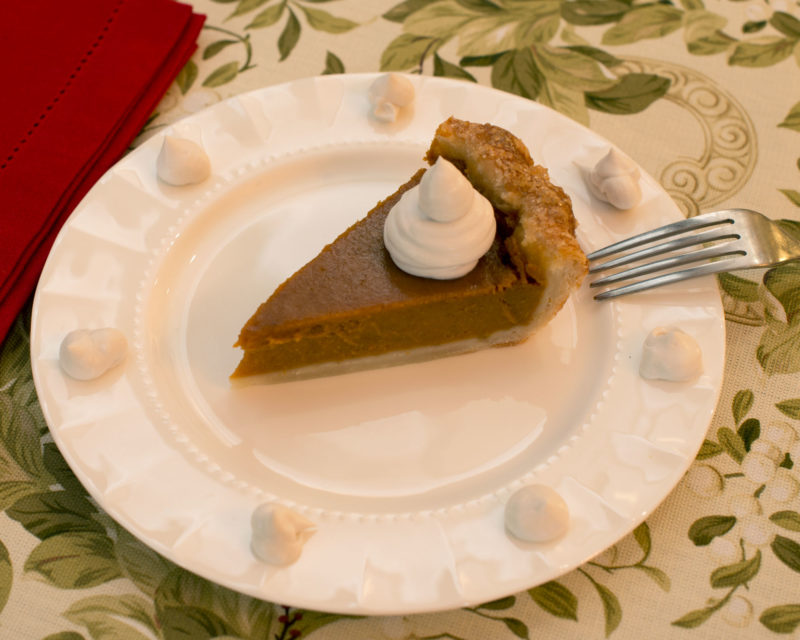
This pie, loosely based on a 1964 recipe by Avanelle Day, is smooth and creamy, sweet but not cloying, and rich with warming, comforting spices. Best of all, it’s completely egg- and dairy-free, and doesn’t require any hard-to-find specialty ingredients. For the best texture, make this pie in advance and allow it to set in the refrigerator for at least four hours. If making your own pumpkin puree, be sure to choose a pie or sugar pumpkin: the pumpkins used for carving are too watery and lack flavor. A Chef Sara Boan  Compassionate Cuisine program (Compassionatecuisine.org [1]) recipe.

Chef Sara’s Favorite Vegan Pie Crust: Making pastry from scratch can feel intimidating, but it doesn’t have to be! Often vegans feel they have to miss out on this classic delight because traditional recipes include butter. This recipe for Perfect Pie Crust uses a traditional approach, but replaces dairy-based butter with vegan butter. The result is a delicious, rich, and flaky pie crust that works perfectly for just about any dessert pie. The tricks for achieving a tender, flaky crust includes keeping your ingredients cold, using a light hand when mixing, and allowing the dough to rest, all of which are outlined in the recipe. Making this Perfect Pie Crust recipe a day or so in advance allows the dough to rest and makes for easier assembly when you’re ready to use it. For a soy-free option, choose a soy-free vegan butter or vegetable shortening. 

Coconut Whipped Cream: When refrigerated for 24 hours and then whipped with powdered sugar and vanilla, coconut milk makes a rich and luscious dairy-free whipped cream that tastes amazing on a slice of pumpkin pie. For best results, choose coconut milk or cream without added guar gum. 

Summary

Yield
9 inch pie

Instructions

Method For the Pie

  1. Preheat the oven to 375 degrees Fahrenheit. Place the prepared pie plate on a baking tray.
  2. In the bowl of a food processor, combine the pumpkin purée, maple syrup, brown sugar, coconut milk, cornstarch, salt, ginger, cinnamon, nutmeg, and cloves, and process until smooth, scraping the side of the food processor bowl as necessary. Pour the mixture into the pie crust, then smooth the top. Brush the exposed crust with non-dairy milk, then sprinkle with the optional turbinado sugar for a sweet and sparkly finish.
  3. Bake for 45-55 minutes, until the filling looks mostly set and is starting to crack around the edges. If the crust browns before the filling is fully baked, use strips of foil to loosely cover the crust, then return to the oven for the time remaining.
  4. Cool at room temperature on a wire rack, then transfer to the refrigerator to chill for at least four hours. Keep any leftovers refrigerated for up to five days.


Method For the Crust

  1. In a medium-large bowl, combine the flour, sugar, and salt, and whisk together to mix. Cut the cold vegan butter into ¼-inch cubes, add to the bowl of dry ingredients, and place the entire bowl in the freezer to chill for 10 minutes. (Alternatively, leave to chill in the refrigerator for at least 30 minutes, or up to several hours.)
  2. Using either a pastry cutter or two knives, cut the vegan butter into the flour mixture until the butter pieces are the size of small pebbles. (Alternatively, use a food processor, pulsing a few times until the shortening pieces are the desired size. Be very careful not to allow the dough to gather up into a ball: overworking the dough will result in tough pastry.) Mix together the apple cider vinegar and ice water in a small bowl, then pour over the crumbly dough, mixing together gently with a fork until the dough just holds together. Add in extra ice water as needed, one tablespoon at a time, if the dough is too dry.
  3. Flour a work surface, then gather the dough up into a ball and transfer it from the bowl to the floured surface. Pat the dough out into a rough circle approximately 5-6 inches across, then wrap the disc in plastic wrap, place in the refrigerator, and allow to chill for at least 1 hour, or up to a couple days. (The dough can also be frozen at this point, for later use.) Chilling the dough allows the gluten to relax, which will make the crust more tender.
  4. When you’re ready to roll the crust, flour a large piece of parchment paper, unwrap the chilled dough, and place the disc on the floured parchment. Sprinkle some more flour on top of the disc, then use a rolling pin to roll the dough out into a circle that’s a several inches larger than your pie plate. Place the pie plate with the open surface flush against the rolled out crust, then, with one hand under the parchment and one securing the pie plate, flip everything over so the crust is sitting atop the pie plate. Gently peel off the parchment paper, press the crust down into the pie dish, and trim the edges. Decoratively crimp the edge however you like, or leave the edge plain if using a double or lattice crust later, then proceed with your recipe.


Method For Coconut Whipped Cream

  1. Refrigerate the coconut milk or cream for 24 hours or longer — this step is essential in achieving the perfect texture. Open the can from the bottom, pour off the coconut water (reserve for smoothies if you like), then scoop out the thick coconut cream into a medium bowl. Add the powdered sugar and vanilla, then use a hand mixer to whip the mixture until lighter-textured and fluffy. (Alternatively, use a standing mixer with the whisk attachment.) Serve immediately, or refrigerate until needed. The coconut whipped cream will keep in the refrigerator for 3-5 days.

Links
[1] https://casanctuary.org/compassionate-cuisine/