Growing Veggies Indoors

Want to grow your own organic greens and many kinds of vegetables all winter regardless of your USDA zone? And have the satisfaction of digging in the soil even as it’s snowing outside? Consider doing what we did and get some EarthBoxes. It’s one of the best ways to chase away the winter blahs. First of all, let it be known that we are just very satisfied customers and have no business connections with the company. Nor do you have to use EarthBoxes at all. You could easily plant directly in pots instead of EarthBoxes, although you may not have the same yield. We have found the EarthBox system pretty foolproof. The plants always receive the proper amount of water as long as you don’t let the reservoir dry out, and the company’s fertilization and mineral packets provide exactly what your vegetables and herbs need to flourish. The patented container system uses a soilless medium; a dry, granular 8-5-3 organic fertilizer; and dolomite (a source of calcium and magnesium). You’ll also need some full-spectrum grow lights, a timer, seeds, and a little space in your basement or a corner of the house with a floor that can get wet when you water. City dwellers and those in homes with poor soils can use this system to grow vegetables and herbs on balconies, terraces, or decks. It also a nice option for the elderly because there’s no digging and the containers can be wheeled around.
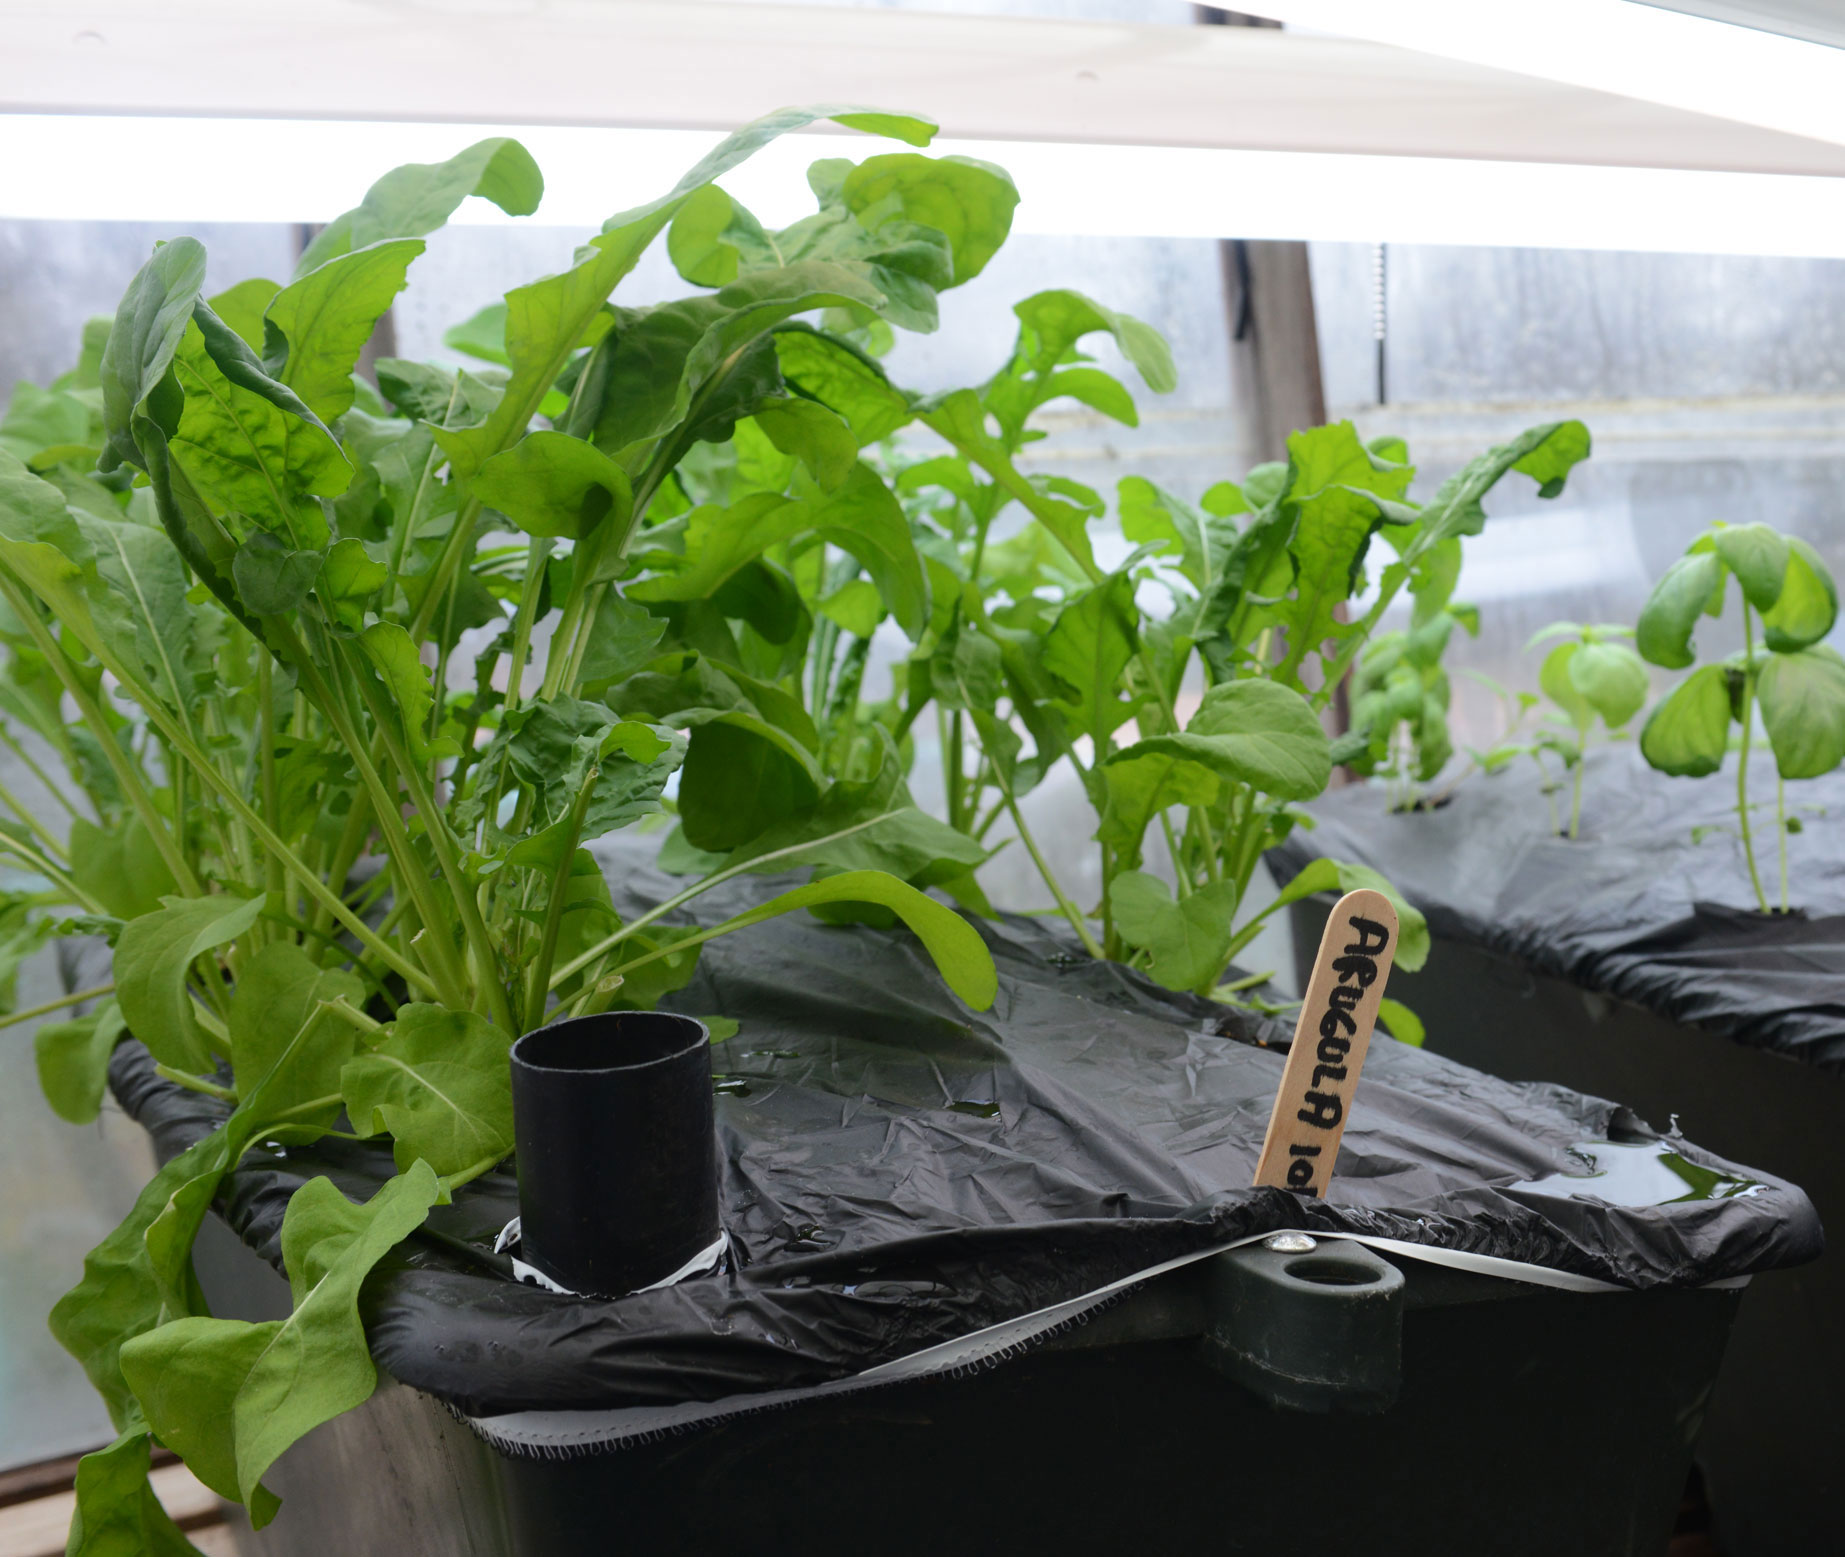
Kale, Chard, and Spinach, Oh My!
At the Spiral House in upstate New York, where winters can dip to 20 below, we usually start planting our EarthBoxes under lights in our sweet but sadly ineffective greenhouse in early October so that by the time our greens are finished in our outdoor garden we have something growing indoors in containers. We cultivate greenhouse tomatoes, Swiss chard, kale, spinach, several varieties of lettuces, escarole, basil, cilantro, parsley, and dill. In past years, we have also successfully grown collards, cucumbers and an assortment of tomatoes but due to space limitations we have settled on what grows best in the area we have.  Developed in the early 1990’s by a commercial gardener, the EarthBox system eliminates guesswork, although we do recommend that you sterilize them between uses with a little soapy water and bleach. Each 29-by-13.5-by-11-inch EarthBox is made of food-grade plastic and holds three gallons of water and two cubic feet of growing media. (We buy our organic replant kits from EarthBox each year but purchase organic Espoma or ProMix soilless medium from our local garden center because of shipping costs. When filled with growing mix and water, an EarthBox weighs approximately 80 pounds but optional wheels make each box somewhat portable. We don’t care for the company’s trellises, preferring, instead, to poke our own stakes through the black plastic covers that are part of the system. The gardener cuts a predetermined number of holes into the plastic cover for each plant based on the company’s templates for that crop. EarthBoxes are watered through a tube that refills the reservoir, sending moisture to the roots from the bottom up. The plastic covers keep the water in and weeds out. It’s that simple.
Let There Be Light
Plants need lights to grow and the light must be adequate or your plants will be leggy and weak. This means you’ll need some grow lights unless you have a bright sunroom with strong sunlight. Metal halide lights that produce a strong output of the blue spectrum are conducive to leafy growth and are considered one of many good sources of artificial light when growing indoors. One bulb should last about 10,000 hours. When it is time for the plants to flower, switch to a high pressure sodium bulb whose reddish-orange light promotes flowering. Be aware that sodium bulbs are not ideal if you are only going to use one bulb, however, because they will not give you the leafy growth you’ll want. The downside of these bulbs and fixtures is they are costly and give off heat. The plants’ leaves will burn if you don’t maintain the right distance.  We have several metal halide bulbs and ballasts, but since we had an assortment of florescent shop fixtures when we started we’ve been using those, too, replacing them with the thinner and more efficient T-5 tubes and their fixtures as new bulbs are needed. The T5 bulbs can — and should — be placed closer to the plants because they give off less heat than the metal halide bulbs, a marked advantage. Whatever you choose, hang your fixtures by rope or chains so that you can keep the lights as close to the plants as possible without burning them, raising the lights as the plants grow. Most vegetables and herbs do well with 14-16 hours of light or simulated light. As a general rule of thumb, a 400-watt unit will light a five-by-five-foot area; a 600 watt unit will light a seven-by-seven-foot area; and a 1000-watt bulb will light an eight-by-eight-foot area.
Some tips:
- Mist your plants and, if possible, wet the floor. We have found this helps to maintain proper humidity because our indoor heating systems tend to dry out our homes. If you have a humidifier, use it.
- Try to maintain a temperature of 65-75 degrees Fahrenheit or at least within ten degrees at either end of the spectrum.
- We start our seeds right in the holes cut into the plastic covers of the EarthBoxes. Just be sure to plant them at the correct depth — not too deep or too shallow.
- Mist the soil where your seeds have been planted until the seedlings' roots are large enough to draw water from the surrounding soil on their own.
- If you want to move your EarthBoxes outdoors in spring, make sure you “harden off” your plants, slowly acclimating them to outside conditions. Place them in a shady spot for a few days; do not allow them to sit in the hot sun until they have hardened off. Next, let them bask in the cooler morning sun, for a few days, eventually moving them to a sunny spot. The whole process should take 7-10 days. Bring them inside at night and pay attention to frost warnings after they are outside for good.
- Remember, with the EarthBox system, no additional fertilizer is required beyond the one sold by the company. EarthBox sells both organic and conventional fertilizer; we like the organic.
- When your plants have reached their end, remove the old plants, the old fertilizer strip and some of the surrounding media. Top the EarthBox with some fresh soilless mix, stir in one cup of dolomite, and put another strip of fertilizer down in the center or along one end of the box based on the company’s planting guide for the specific plant you have chosen. (It will be easier to understand when you have the EarthBox instructions in front of you.)
- The company claims you can use the same growing media for up to six growing seasons but we toss ours every spring and replace it every fall just because there is a yucky mold that grows under the plastic cover. (EarthBox reps insist it is part of the natural process.) The spent growing media can be used to thin heavy soil in the garden or outdoor pots since it’s peat-based.
There’s nothing quite like fresh greens and herbs right out of the garden. And we have found this to be especially true in the Northeast in January as we enjoy a spinach salad or sautéed greens fresh from the greenhouse. Enjoy. For more information, contact: https://earthbox.com/