Microgreens: Seed to Table in 7-10 Days
Did you know these tiniest of greens pack a hugely healthful wallop? You’ve seen them as garnishes in fine restaurants, where chefs like to use the delicate young plants to enhance the presentation and taste of their soups, salads, entrées, and sandwiches. They are available commercially but need to be fresh-cut from a germination tray to preserve their flavors and texture. How much better then to grow your own, an option that will give you a steady and inexpensive supply. You can grow them indoors just about anywhere, from the basement to a corner of the kitchen. All you need to get started is a germination tray, some potting soil, organic vegetable seeds suitable for microgreens — broccoli is our enduring favorite — and a full-spectrum florescent grow light to provide a steady and even supply of light for about 12 hours per day. Or do what we did and get fancy with a 3-Tier SunLite Garden from Gardener’s Supply Company. That way, you can start your garden seedlings side by side with your microgreens. Needless to say, there are many cost and space options in between, including peat pots in a sunny window. The most important requirements are bright, full-spectrum lights and healthy organic seeds. We buy our seeds from Sprout People. Your full-spectrum florescent lights, germination trays, and organic potting soil (either soil or peat-based) are available at any large garden center. Pick up a standard shop light fixture at your local hardware or building supply store. A timer is helpful so you don’t have to turn the lights off and on. We use a good organic soil-free planting mix either by Pro-Mix or Foxfarm. Place an inch or two of moistened soil on the bottom of a germination tray, generously scatter your seeds evenly over the soil, press down lightly, and cover with a thin layer of planting mix.
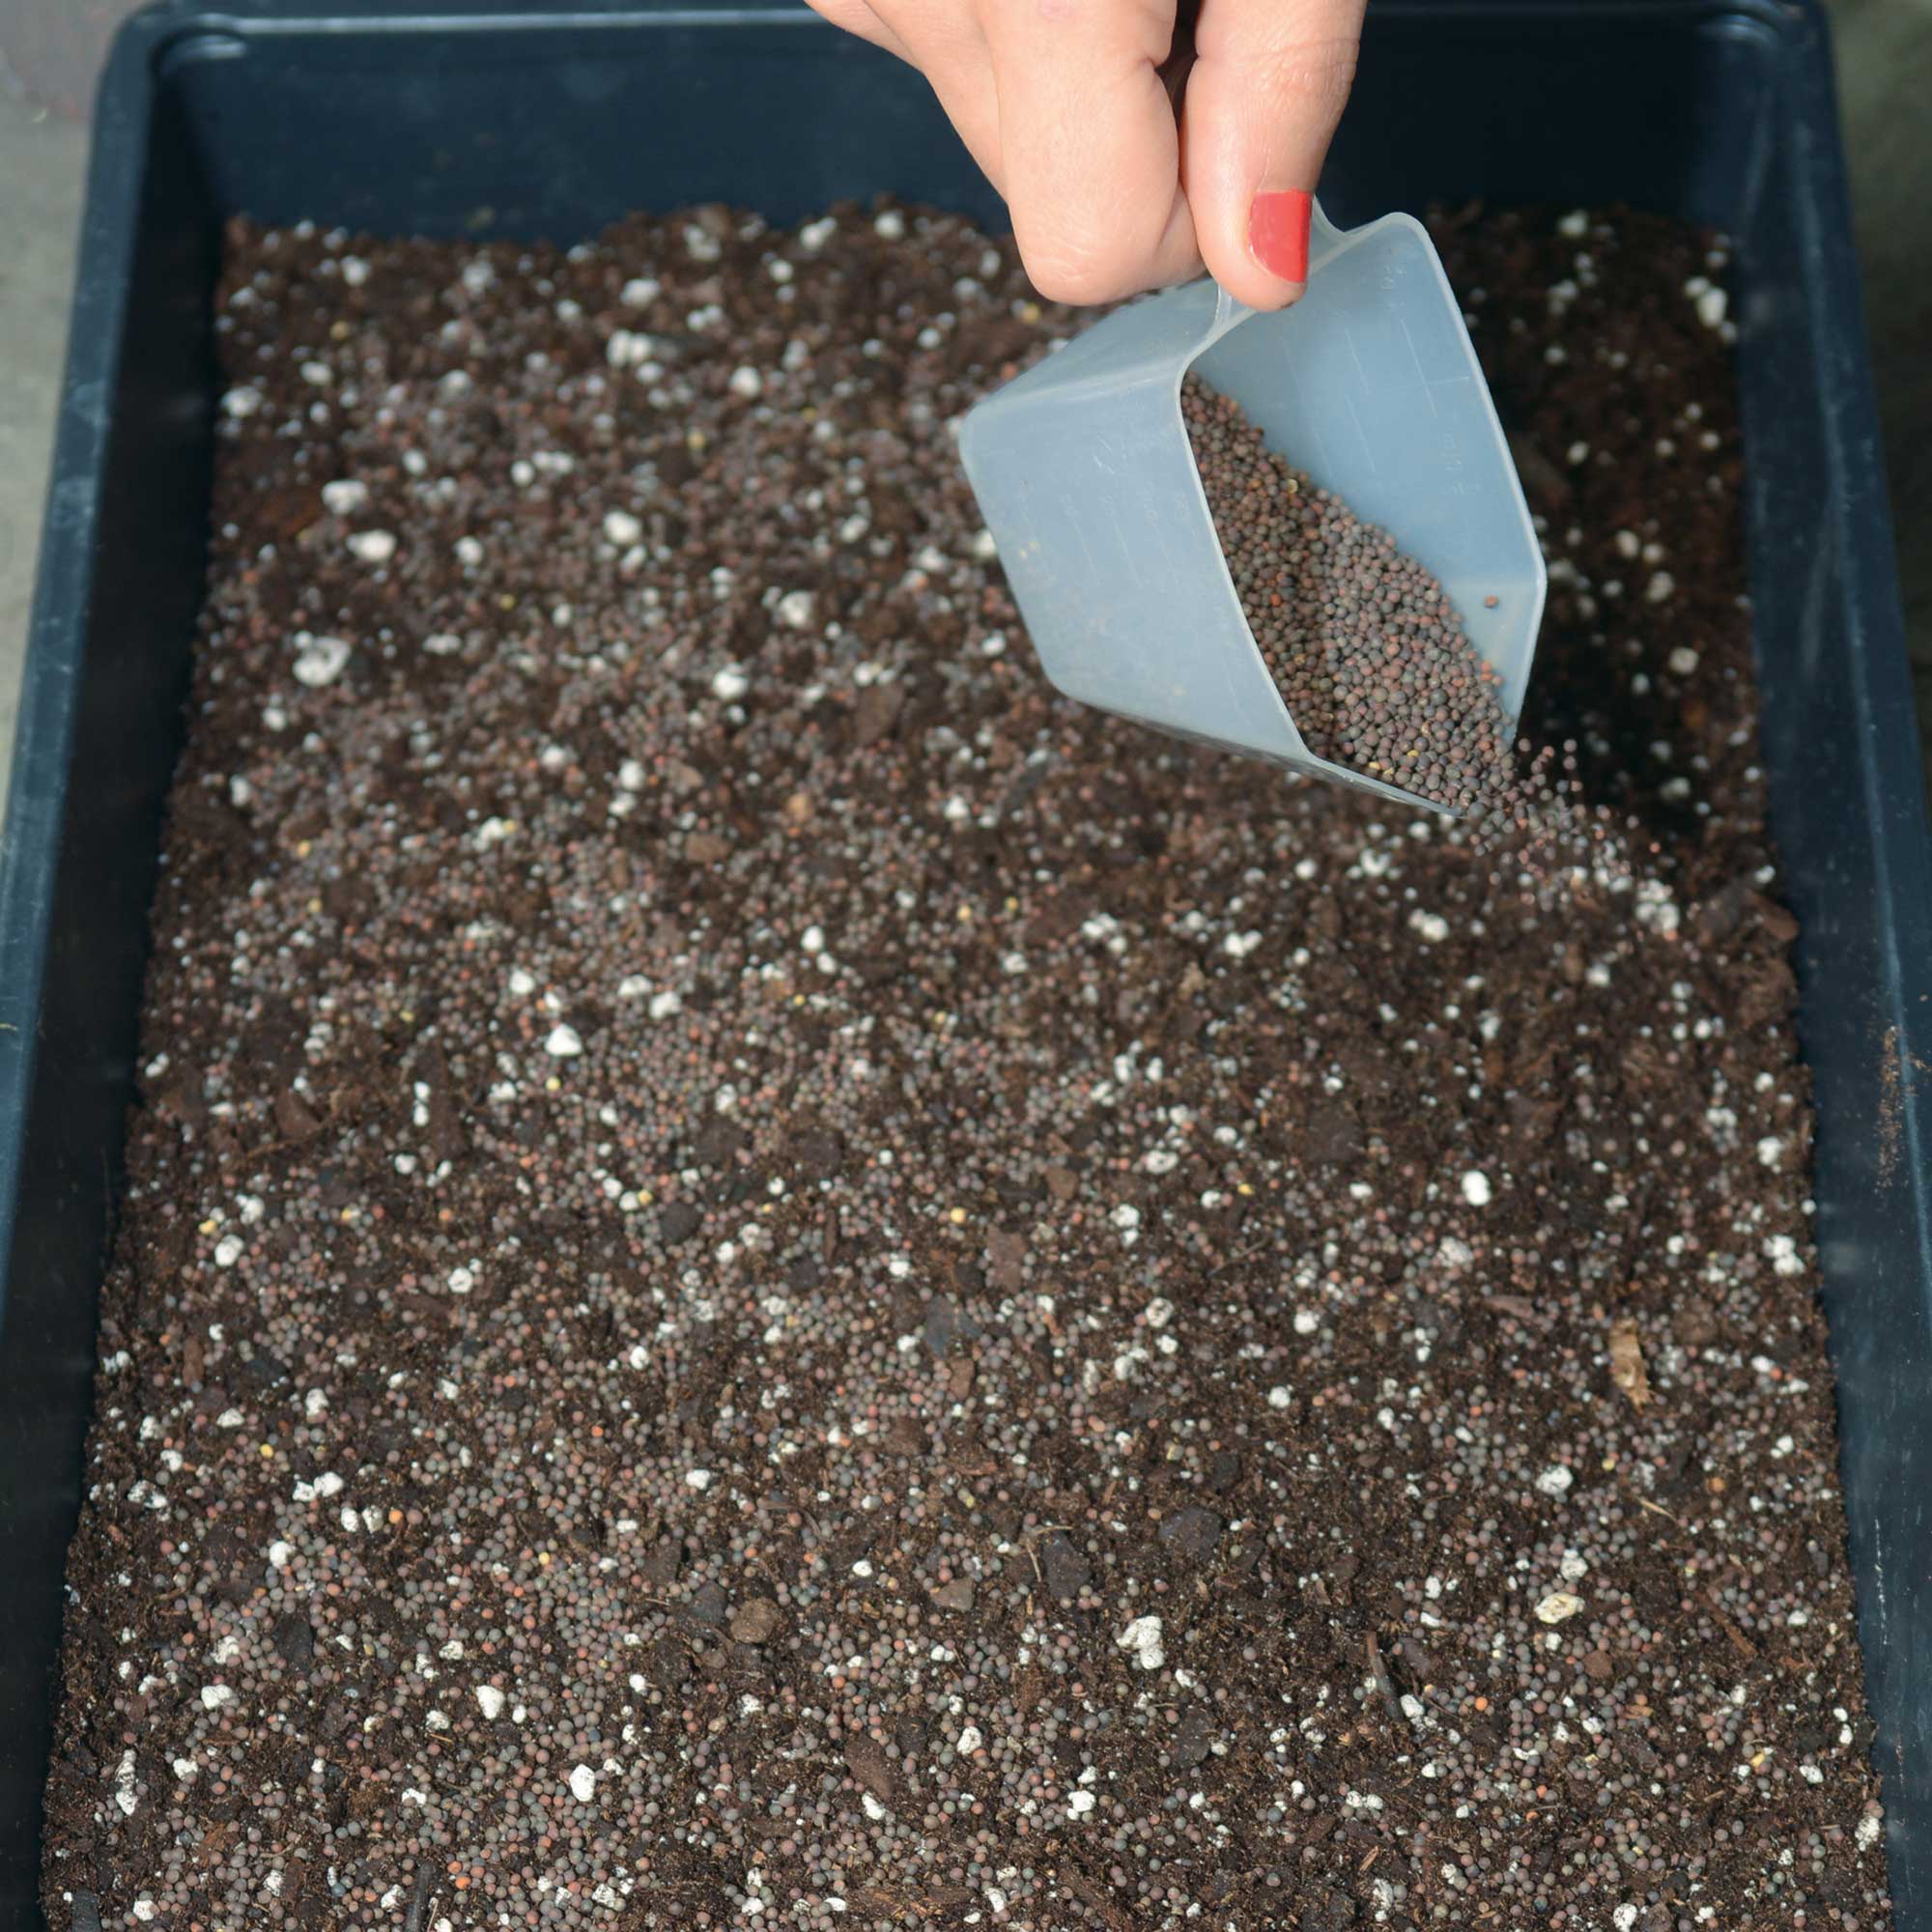
 Sprinkle seeds generously on top of soil and cover with a thin layer of fresh soil.
Moisten the soil well with a mister and mist once or twice daily with a spray bottle.When your microgreens have their first real leaves (about 7-10 days), they are ready to eat. With a clean scissors, cut them close to the soil level, using the tip of the scissors to trim away or scrape off any loose soil that adheres to the greens.
 After covering seeds, spray well with water to fully moisten soil. Keep seeds moist.
The best seeds for growing microgreens are salad greens, leafy vegetables, and herbs. Once you have the hang of it, consider growing a few different types at the same time in different trays because of the different germination times. Beware of seed mixes from suppliers for this reason. You can create your own “house” mix after harvesting. There are lots of greens to choose from: arugula, basil, beets, broccoli, cilantro, cress, dill, flax, kale, mizuna, mustard, peas, purple or daikon radish, and tatsoi, just to name a few. They are best purchased from a microgreen seed supplier so you can buy in the bulk you will need. The little seed packs at your garden center won’t cut it.
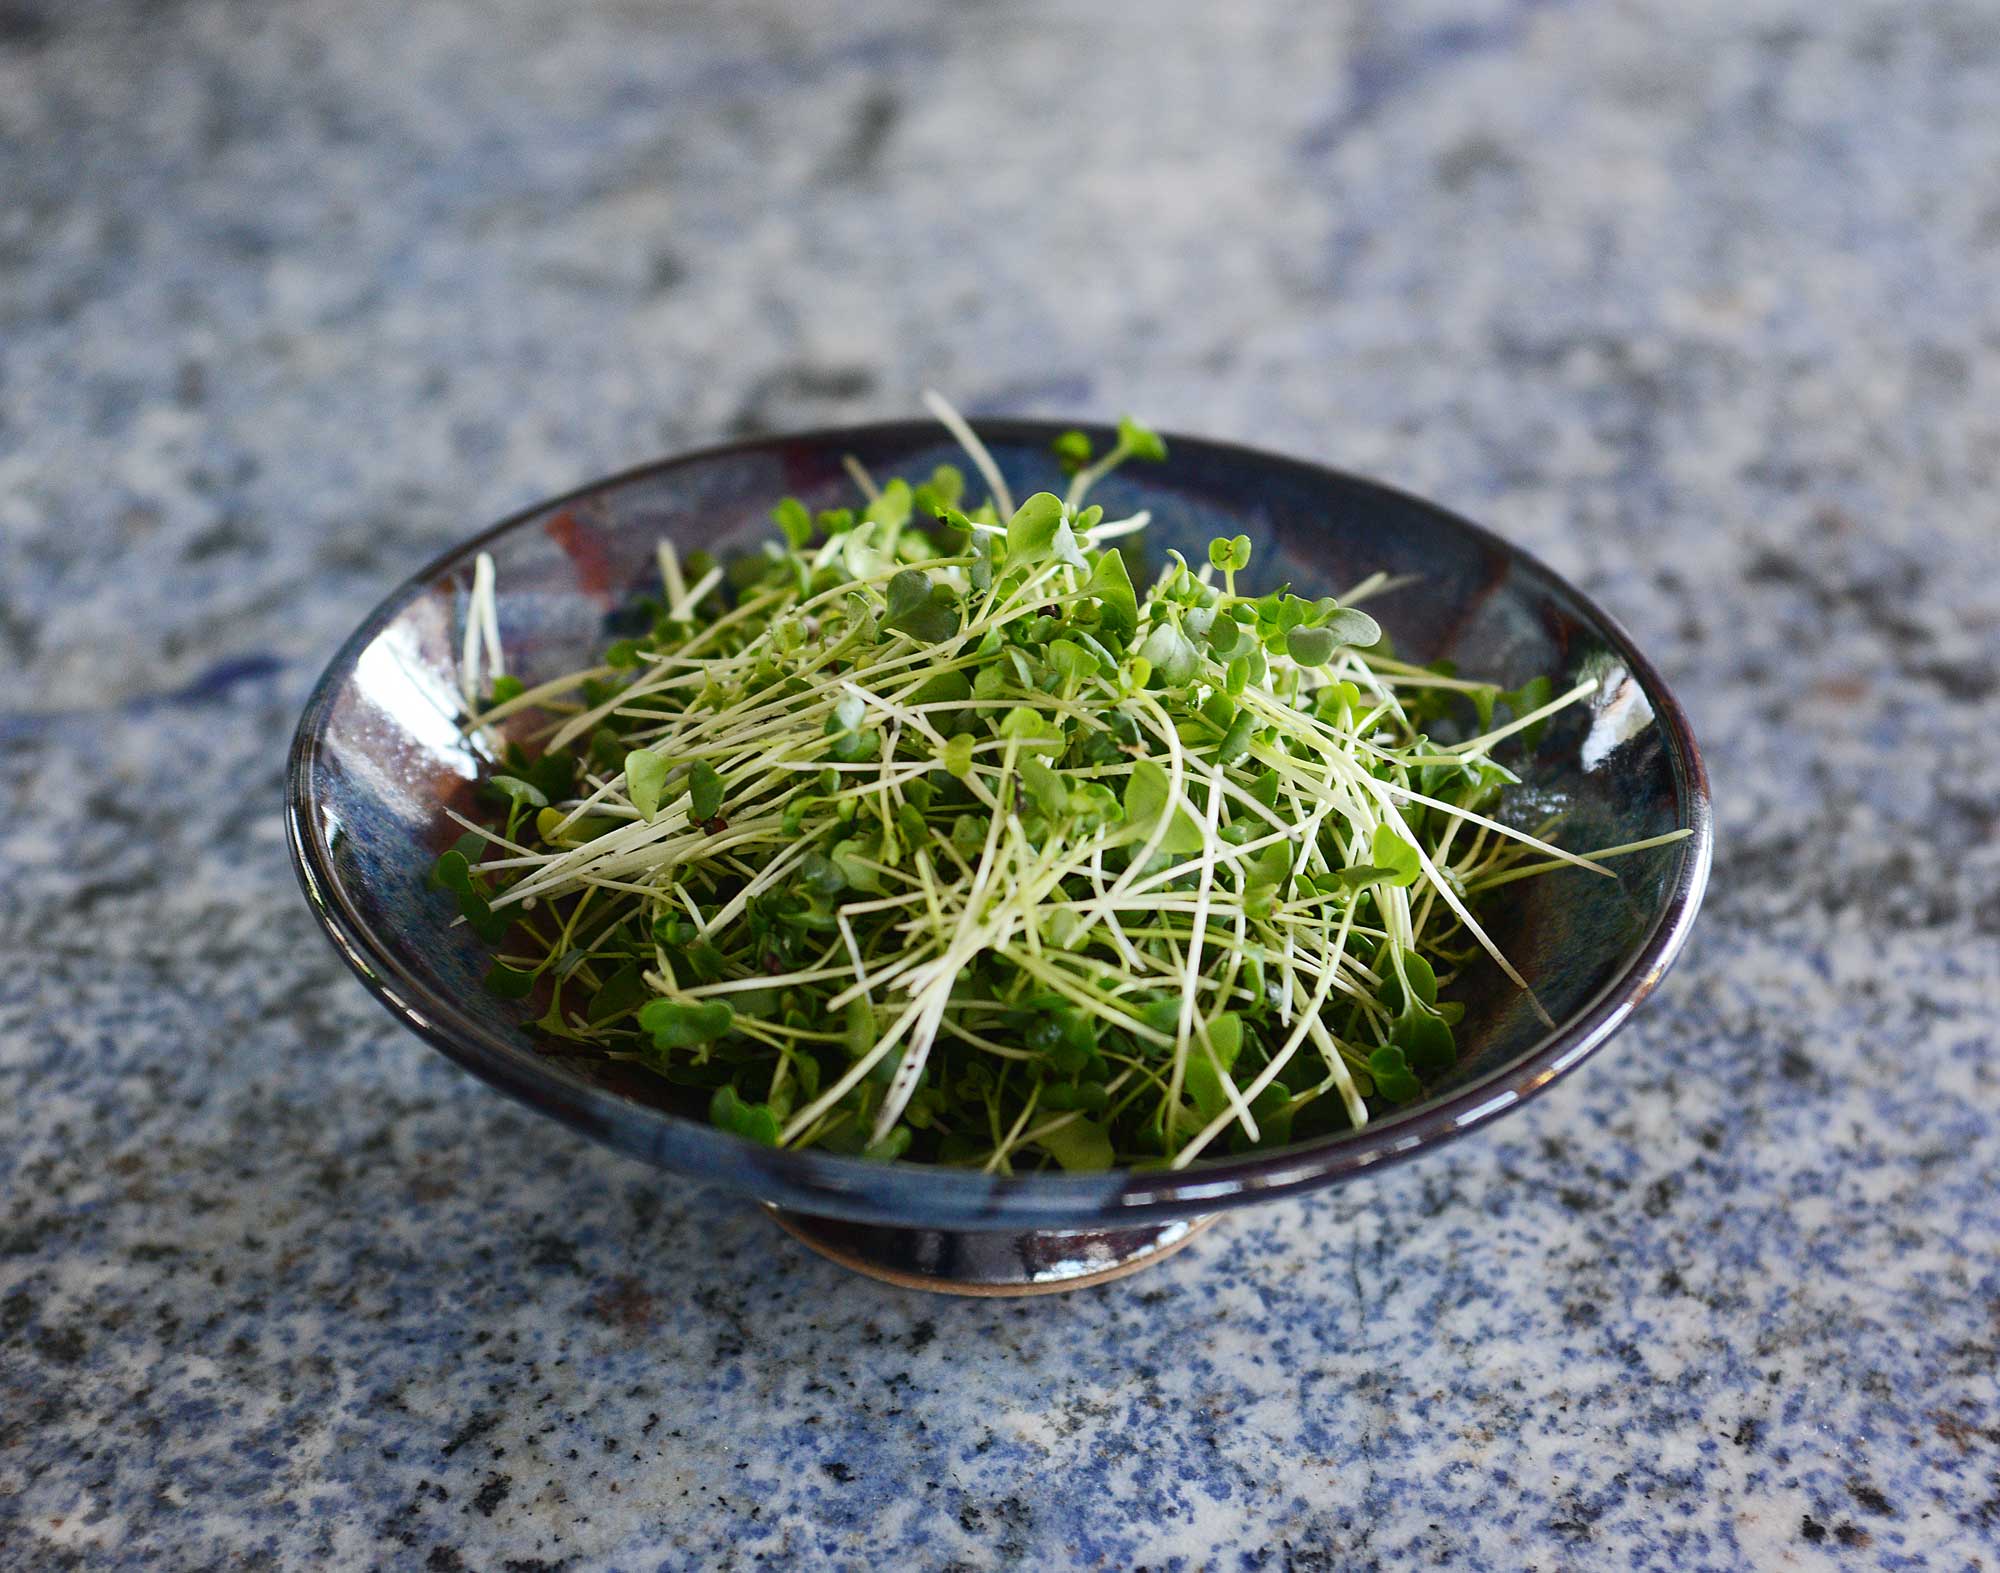
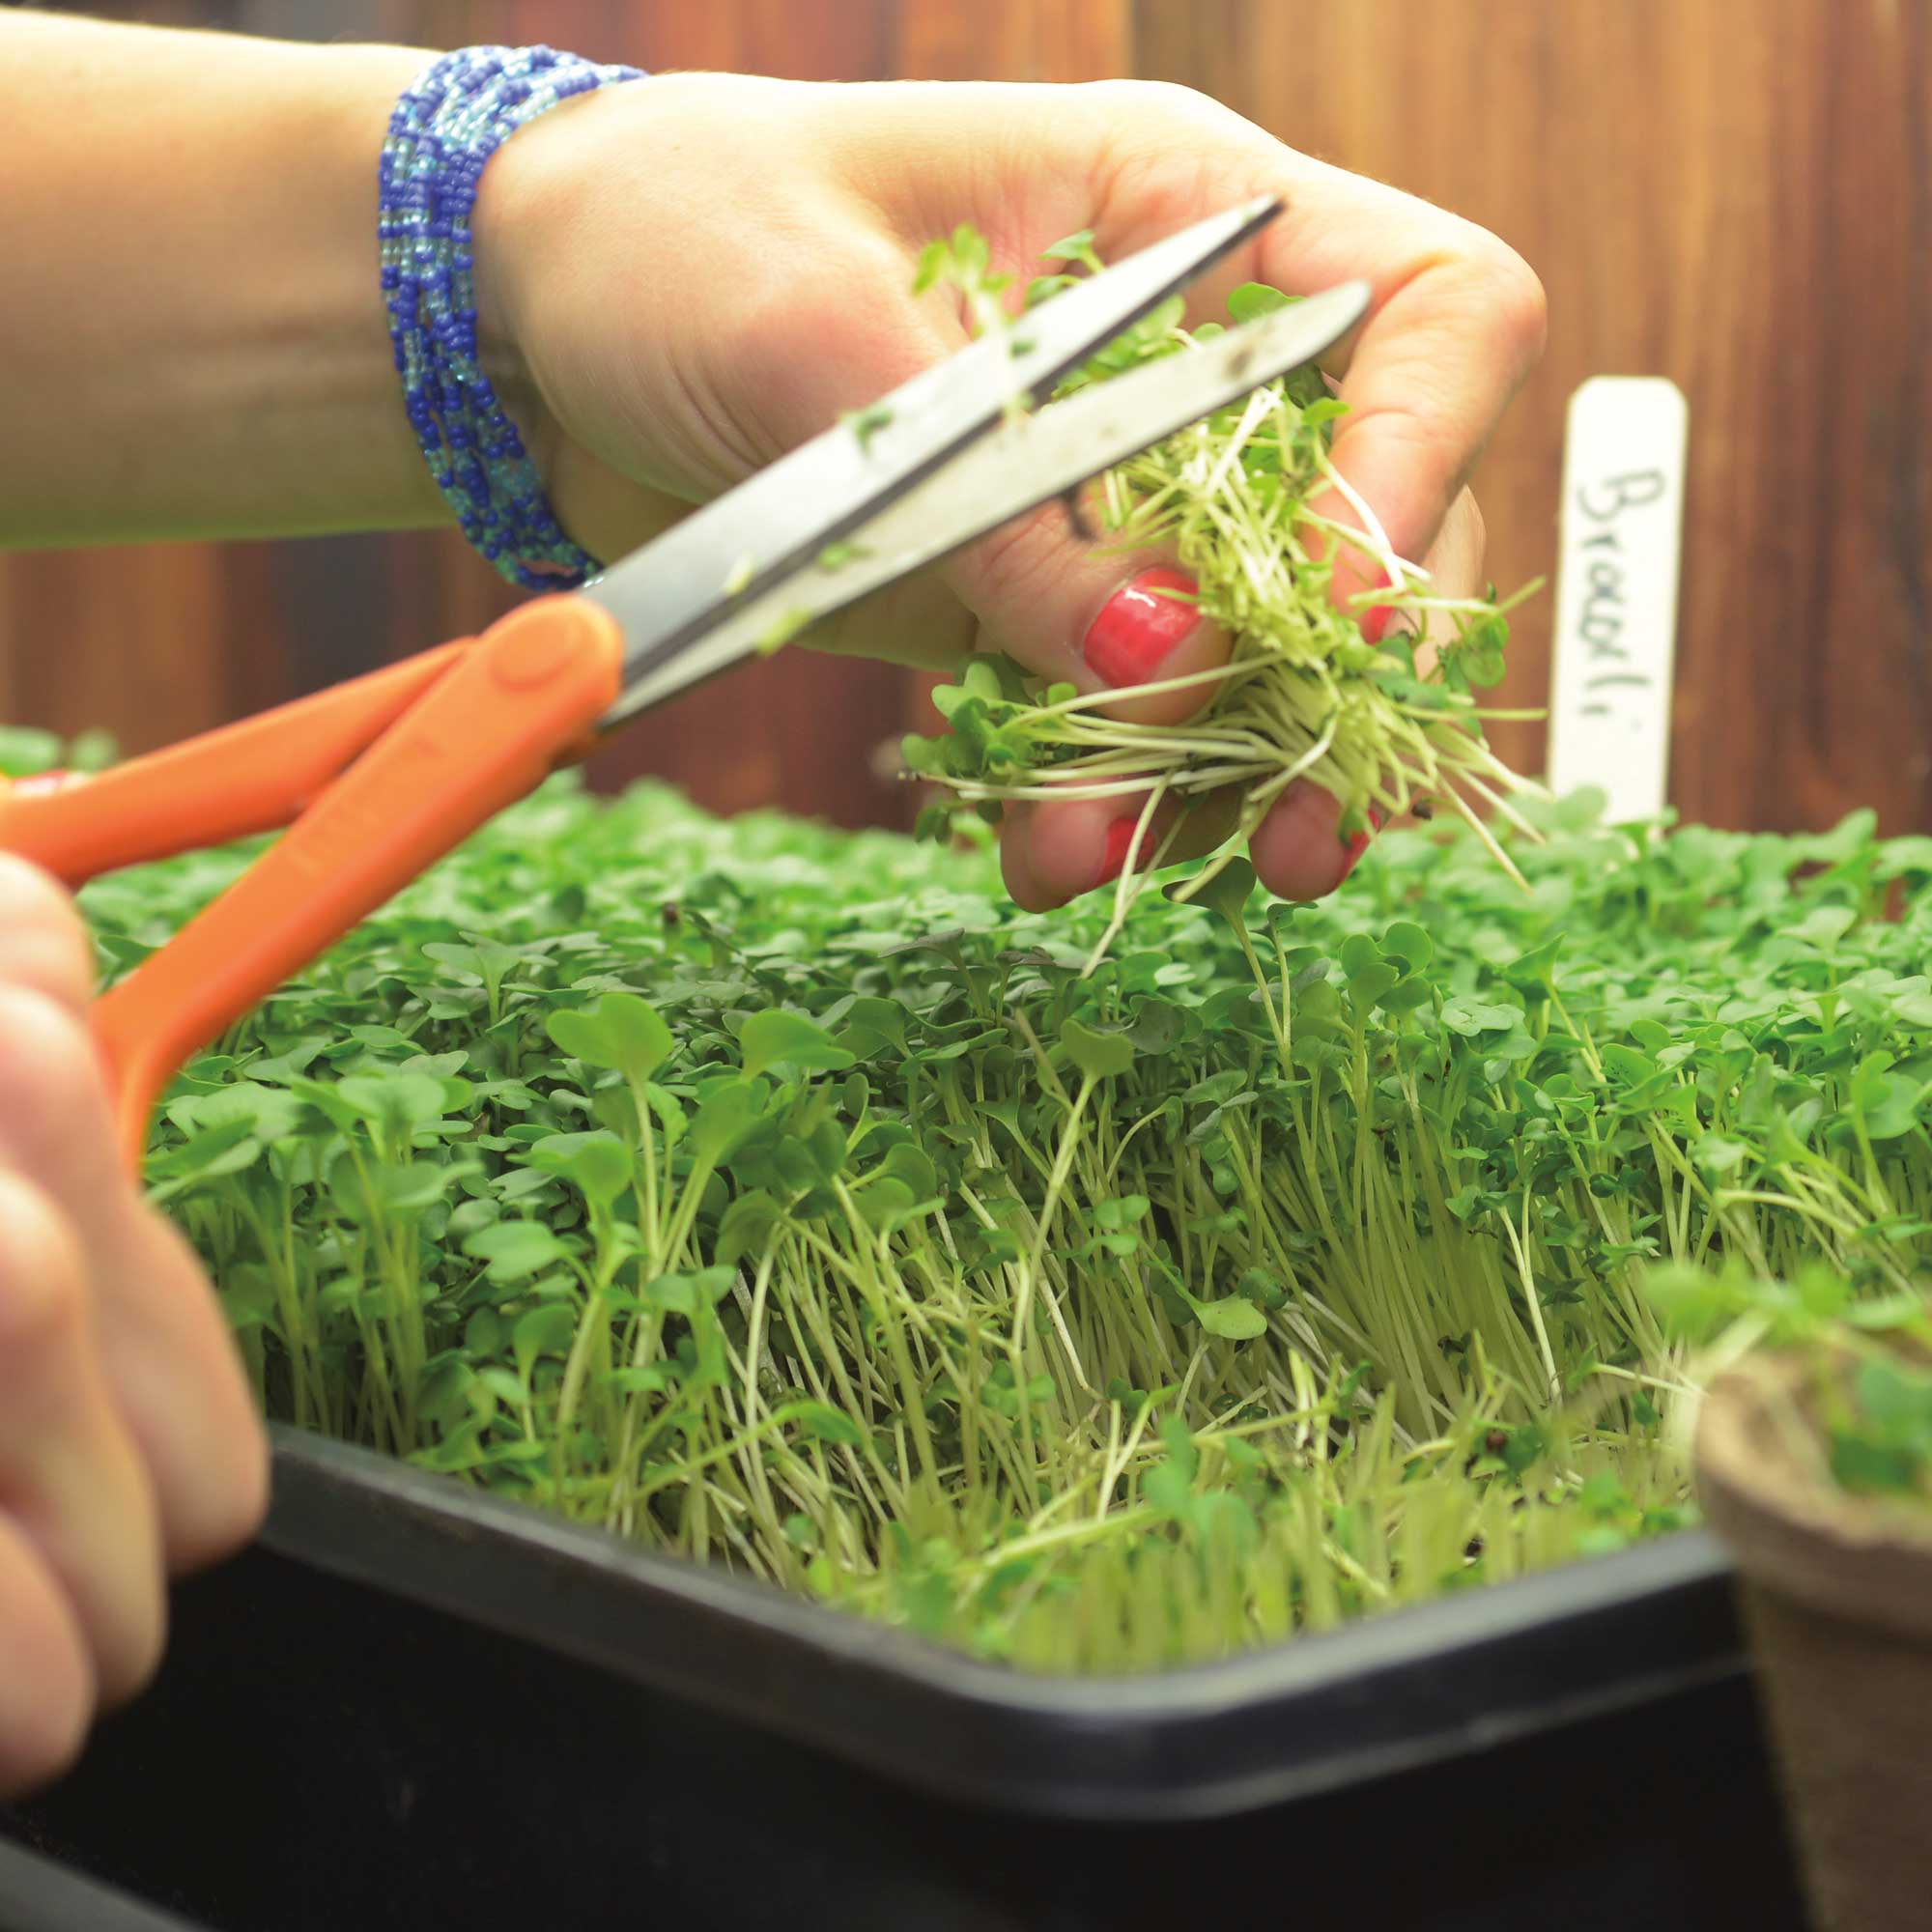
 In 7-10 days, microgreens will be ready for harvesting. Cut a clump at a time just above soil level, using the tip of the scissors to scrap off any excess dirt.
So what’s the reason for our love affair with microgreens? Unlike sprouts, which are grown in water, microgreens are grown in soil and eaten as soon as the fully developed stems and leaves appear, generally about 7 to 10 days after planting. A study done at the University of Maryland in College Park in 2012 found that microgreens were four to 40-times more concentrated with nutrients than their mature counterparts. Extremely high in vitamins, minerals, and enzymes, a very little goes a very long way. Use them fresh as garnishes, in place of—or with—lettuce on a sandwich, generously mixed into salads or just about anywhere to add nutrition, color and a bit of zest. You’ll have a tough time finding a food that is fresher. [showrecipelong recipeid=260 recipetitle="Tom's Cottage Pie"]